

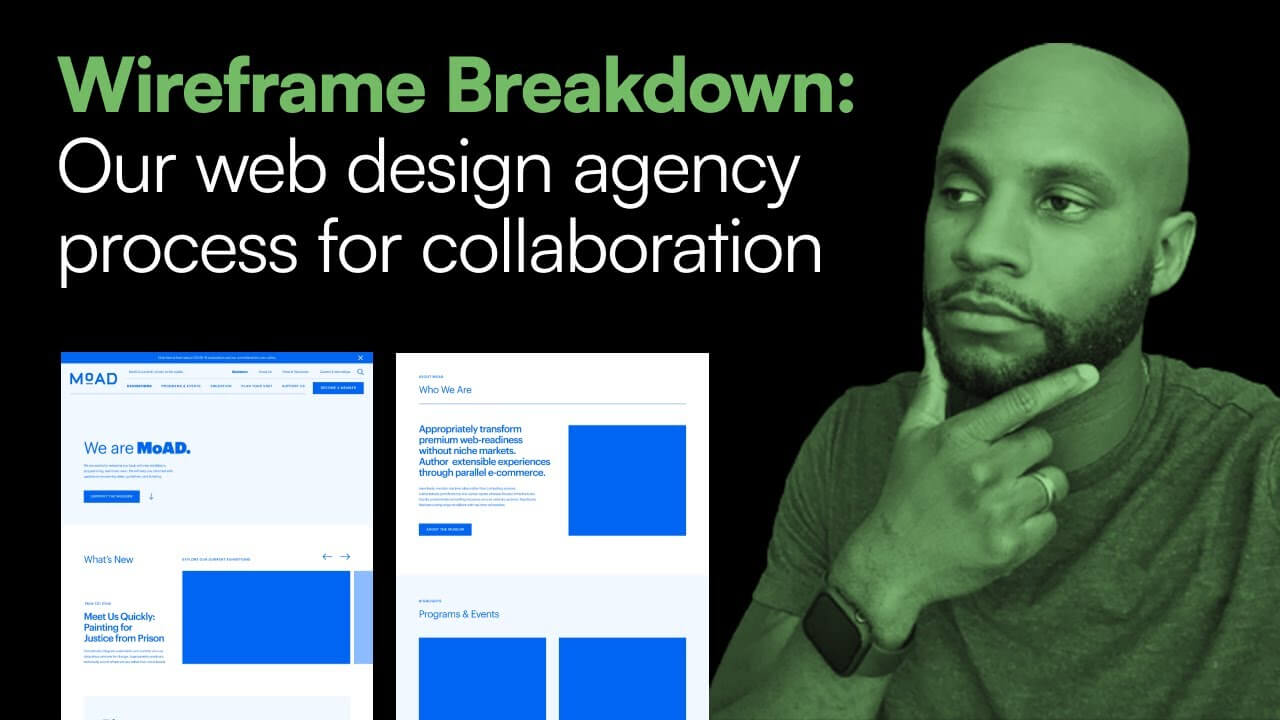
In today’s video, I’m breaking down our wireframe process, and how we help startups develop their website design and development strategy by leaning on wireframes to get it done. Let’s dive in.
I wanted to show you this doc here: this is our job template, and this is what we add to Asana to track all of our tasks for clients. So in this video, I wanted to focus on our wireframe process and how we take client ideas from brand discovery—that initial session—turn it into a sitemap, wireframe, and then the high fidelity wireframe that we go into development with.
To show you a snippet of that process, what we usually do—this is probably 80-90% of the time—we’ll have a brand discovery with the client.
Overall, a web design and branding project will take over 90 days, so that first week will have that brand discovery. And during that discovery session, we ask questions like their value statement, their competitors, what are the specific services that are needed on their site, what they do, their programs—so we get and gather as much information as we can perform a competitive analysis.
And again, I can go into detail in these on more videos, but I want to get more so into the wireframe process.
Once we have that discovery, we essentially have all the info that we need to make informed decisions. So myself and the team, our designer and our AE and our dev, we get together and we through that brand discover to develop a sitemap.
So the process for wireframing at our agency is broken up into 3 sections.
First, we create the sitemap for the overall architecture of the site, then we move into wireframing. And the reason we do that is to be able to provide that to clients to get feedback on their thoughts. We’re creating this based on competitive analysis—which I can get into on another video—and we go ahead and execute in that way.
So just to show y’all, that brand discovery here is kind of the first iteration of the site. Then we go into the sitemap, where we correct feedback and send the client updates, and then work through the website content doc.
But this video is focused on wireframing, so let me show you what that is.
Just for anyone that doesn’t understand what that means, wireframing is a way to design a website service at a structural level. So think of it as the blueprint for your website. It’s used to layout the content, the functionality of the page, the user journey, essentially everything that the user will need to make an informed decision.
And I always recommend agencies doing this. A lot of agencies go straight into the design without having architecture—and again, you can waste a lot of time doing that because the client hasn’t been able to provide feedback, you might not have done any competitive analysis, you’re just going off the cuff, and so you’re not using the experiences, analytics, and competitive analysis to really make those informed decisions.
So with that said, let me show you all the process.
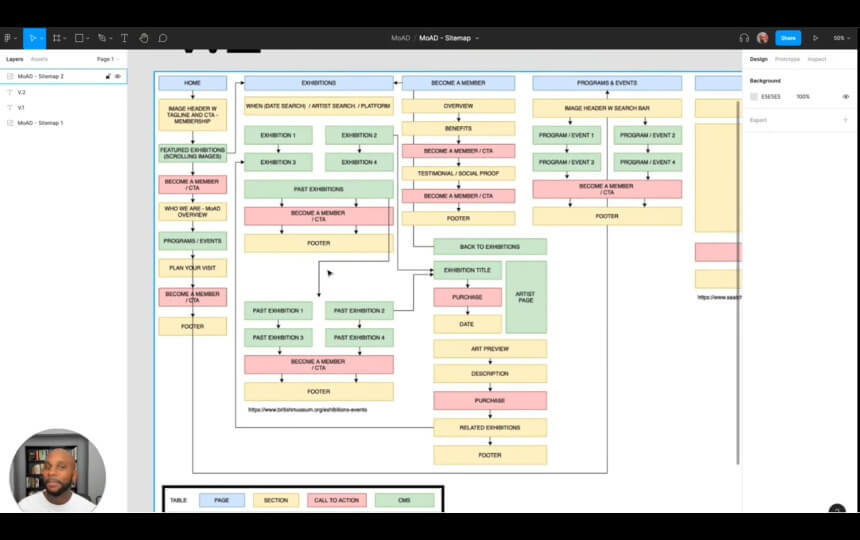
We do all this in a platform called Figma—I’m gonna show you just an example client project. So the first thing that we do is a sitemap, and the way we break it down is by page. So you can see my little table here at the bottom: so anything in blue is the page, yellow is a section of that page, red is the call to action (or button) on that page, and then green is the CMS.
Now CMS is specific to Webflow, we build probably 90% of our websites using Webflow. Because of that, we are able to create a content management system out of a lot of the assets on a website. So think of that as the blog, we can add team members into a CMS, we can add specifics in regards to how the website is displayed, programs, events.
Think of it as anything that’s going to be updated dynamically over time, you can turn it into a CMS via Webflow to help that website grow and be able to give team members access for them to make updates.
Let me show you how this is done. You can do this on Figma, or you can use a free service called draw.io—which is really cool—it’s a free flowchart maker and online diagram software. So check that out when you can, it’s completely free, and you can build out your sitemap using this platform, and it ties in to Google Drive—which is dope.
So with that said, we start by making that sitemap. Now remember, the sitemap is contingent on our competitive analysis and that brand discovery we had.
And so at this point—let me just show you an example. Here I have my homepage, right, this is blue. So this is a page, this is a page, this is a page, and so forth.
Then each of these arrows either have a call to action or section that goes to a specific page. So on the homepage, you have an image header with a tagline and call to action membership—that’s a section. Then we have Featured Exhibitions, which pulls from the CMS, Become a Member call to action, Who We Are.
As you can see, this is the road map of the site: so it’s not necessarily a wireframe, because we’re not displaying the content but it gives a client a visual of what the site will be displayed as and so then what we do is we ask clients to leave their comments.
Now I can get into this in another video, and you can actually check out my last video on creating a knowledge base for your website. But what you can do is, you can create a landing page client—I’ll just show you an example here—and then you can just post their links there.
Let me go ahead and jump back into Figma here and show you the sitemap. So this is the entire sitemap for the website that we created for the client. As you can see, we went through two versions of this: this is v1 and this is v2.
So you can ask clients to collaborate here and leave comments. Now what you wanna do is you wanna give them complete creative freedom, right?
Because you’re making these decisions based on your experience, you’re looking at competitors, looking at the discovery, so you wanna come into this saying, “Hey, this is the sitemap that we created, this is based on x, y, and z, we’d love your general feedback on it.”
And so you can collect feedback here, and the reason you do this iteratively is because if you just went straight into web design, they’re like, “Hey, we don’t like this whole page,” or “Hey, this whole section needs to go.” Now you and your team have to go back and redesign that.
When you start here in the sitemap process, it’s really just 3 seconds to make a change, right? They’re like, “Hey, Exhibition should be right over here” or “We need an additional section here” then it’s really easy to add an additional box. And what this also does is it empowers your designers and gives them more assets and more resources to get the job done.
Let’s say the sitemap is approved, great, client loves it. What we’ll do is we’ll send over assets to our designers, right? So we’ll send over everything that they need to make an informed decision to move forward.
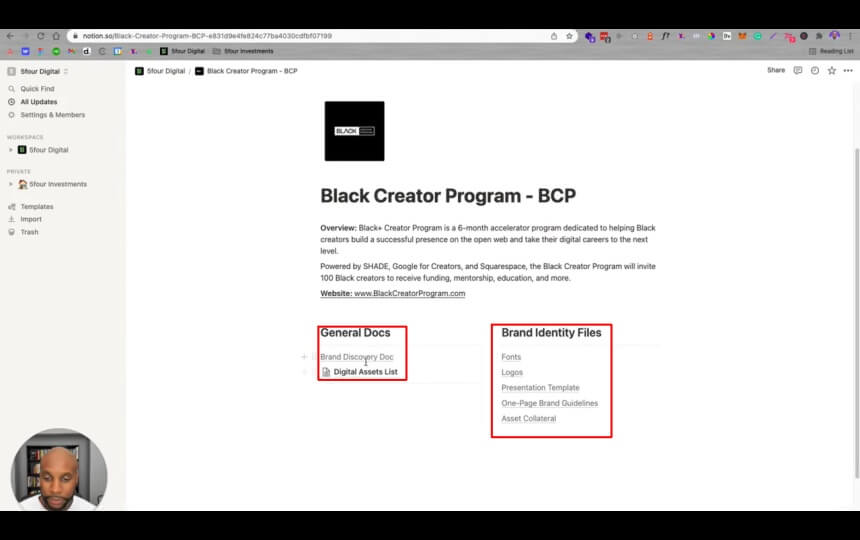
I’ll show you an example of what that looks like. We’ll send over the discovery, the sitemap, fonts, logos, and all this is tied to a Google Drive—again, this is in Notion, you can check out my last video on creating a knowledge base for that—you can see the color files here, anything that they would need, here’s all the eps source files. So they’re able to access everything through that landing page on Notion, and they’re able to see everything here on the Google Drive.
Once that’s done, now we’re going to move into low fidelity.
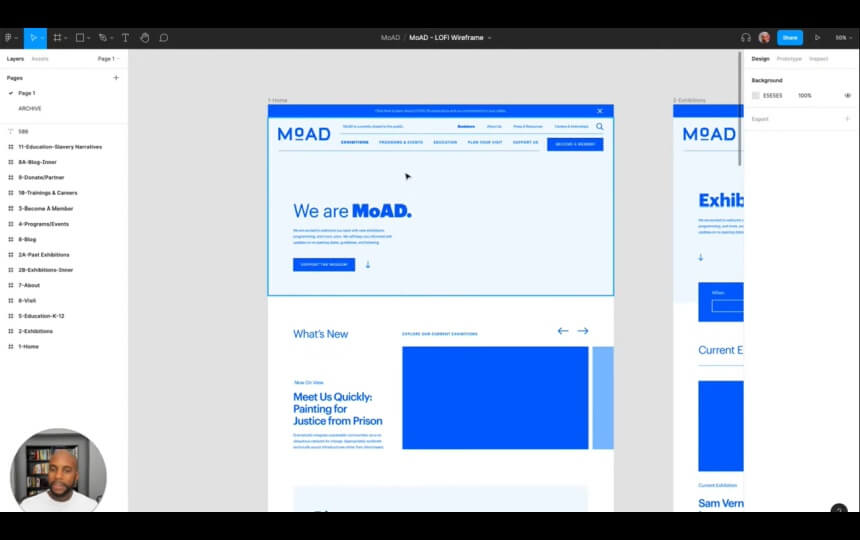
What happens here is this is what the actual site structure will look at. So I made our amazing designer A.B. work on this and as you can see, you can actually call this low to mid fidelity.
To break it down, low fidelity looks like this: It’s the layout and structure of the website. High fidelity is what the site actually looks like in real time. You can see it has content, it has images, it has everything that’s needed.
Going back to this low or mid fidelity because it looks like this has a structure. Now the reason we do this is because we’re able to move faster iteratively through the project.
So we’ve done the sitemap, the client approved the sitemap, we went through some changes, now we’re doing low fidelity here. And as you can see, this page has a lot of the info.
One, it has a structure. We’re using a font and the typography here as well. Of course, there’s filler text. But overall, this is the layout and the design and structure of the final site.
As you can see, all these sections are here. Now the main reason we used this font, the overall layout and design is because then we can go into high fidelity pretty quickly once this is approved.
So the clients approved the sitemap, now in “mid fi,” now we go through another iterative process where they’re leaving comments or updating it, and then once this is approved, then we go into high fidelity.
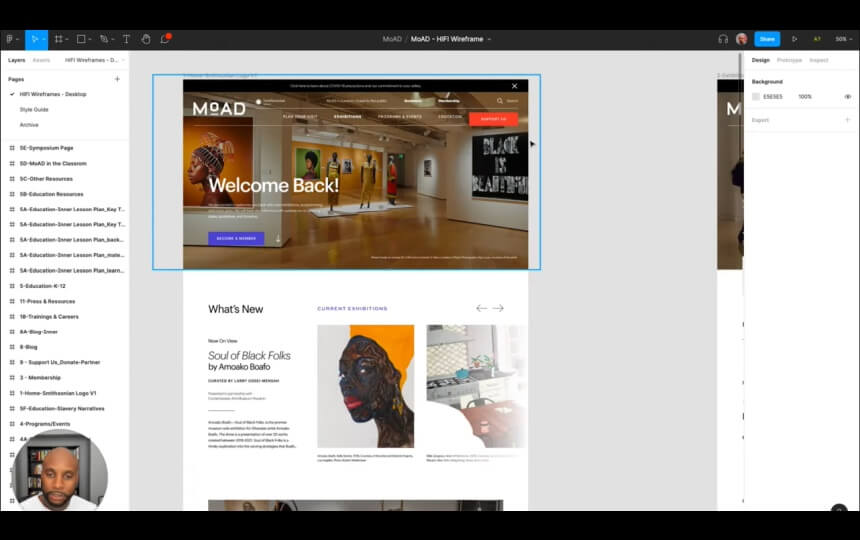
This is what high fidelity looks like. So it looks similar to this low or mid fidelity design, but as you can see, it’s got images, color, a bit more style and design here in this actual structure and layout.
We usually do this, and we add a style guide as well to execute. Then we have an archive of just older files and edits that we’ve had through the past.
Now we’ve done the sitemap, low/mid fidelity, and now we’re at the high fidelity wireframe. The great thing about this is the client’s not going to make fundamental changes to the overall layout and structure. They did that in the low to mid fidelity.
Here it’s really just about getting that final approval on image content and overall layout of the site. Now this gets rid of a lot of issues, and mitigates issues you might have through the process.
If we went straight into this (high fidelity wireframes), and started designing and laying this out, the client might come back with a ton of changes. But because we moved through the sitemap, the low/midfi, and hifi, now we’re here and almost ready to move into development.
So just a quick recap on this: You always want to start with a site map based on your brand discovery session, then move into low/mid fidelity to get that layout and structure done, and then you wanna go straight into hifi.
And that’s a look at our wireframe process! If you want more, you can check out my course or additional Youtube links below, and I hope this was helpful on your website journey, y’all.